 Save to Pinterest
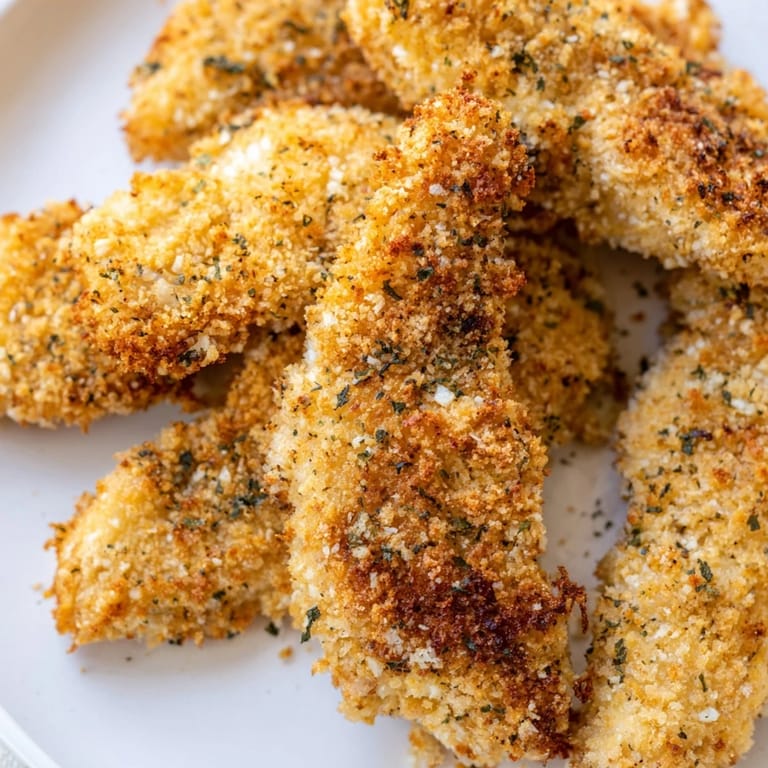
 My youngest refused to eat chicken for months until I baked these strips on a rainy Tuesday night. The panko gave them a crunch that rivaled anything fried, and suddenly dinner became easy again. I started keeping a bag of panko in the pantry just for nights when I needed a win. The smell of garlic and paprika filling the kitchen became a signal that something good was happening. Now they ask for these at least once a week.
I made these for a casual backyard gathering last summer, and they disappeared faster than the burgers. One friend kept asking what my secret was, convinced I had fried them. I just smiled and said panko and a hot oven. She texted me the next day asking for the recipe. Its been passed around our group ever since.
Ingredients
- Boneless, skinless chicken breasts or tenders (500 g): Tenders cook more evenly, but breasts work great if you slice them into uniform strips so everything finishes at the same time.
- Salt (1/2 tsp) and ground black pepper (1/4 tsp): Simple seasoning on the chicken itself ensures every bite has flavor, not just the crust.
- All-purpose flour (100 g): This first coat helps the egg mixture stick and creates a foundation for the panko to cling to.
- Large eggs (2) and mayonnaise (2 tbsp): The mayo adds richness and helps the panko adhere better than eggs alone, you can swap in Greek yogurt if you prefer.
- Panko breadcrumbs (120 g): The secret to that shatteringly crisp texture, regular breadcrumbs just dont compare.
- Dried Italian herbs (1 1/2 tsp): A blend of oregano, thyme, and basil brings warmth and familiarity to every bite.
- Garlic powder (1/2 tsp) and smoked paprika (1/2 tsp): These two add depth and a gentle smokiness that makes the strips taste more complex than they are.
- Cayenne pepper (1/4 tsp, optional): A tiny kick that sneaks up on you, leave it out if youre feeding cautious eaters.
- Olive oil (2 tbsp): A light drizzle or spray before baking is what turns the panko golden and crispy.
Tired of Takeout? 🥡
Get 10 meals you can make faster than delivery arrives. Seriously.
One email. No spam. Unsubscribe anytime.
Instructions
- Preheat and prep your pan:
- Set your oven to 220°C (425°F) and line a baking sheet with parchment paper or place a wire rack on top for even crispier results. The rack lets air circulate under the chicken, which helps avoid any sogginess.
- Prep the chicken:
- Pat the chicken completely dry with paper towels, then slice it into strips about 2 cm wide. Season both sides with salt and pepper so the meat itself has flavor.
- Set up your breading station:
- Arrange three shallow bowls in a row: one with flour, one with eggs whisked together with mayonnaise until smooth, and one with panko mixed with Italian herbs, garlic powder, paprika, and cayenne if using. This assembly line makes coating quick and tidy.
- Coat each strip:
- Dredge a chicken strip in flour, shake off the excess, dip it into the egg mixture, then press it firmly into the panko so it sticks on all sides. Lay it on the prepared baking sheet and repeat with the remaining strips.
- Add the finishing touch:
- Drizzle or lightly spray the coated strips with olive oil. This step is what gives you that deep golden color and crunch.
- Bake and flip:
- Bake for 18 to 22 minutes, flipping the strips halfway through so both sides get evenly crispy. Theyre done when the internal temperature hits 74°C (165°F) and the coating is golden.
- Rest before serving:
- Let the strips cool on the pan for 2 to 3 minutes. This brief rest helps the crust set and stay extra crispy when you bite in.
 Save to Pinterest
 The first time I served these with honey mustard and a big green salad, my partner looked up and said this is exactly what I needed tonight. It wasnt fancy, but it felt like comfort in the best way. We sat at the table longer than usual, talking and dipping and reaching for just one more. Thats when I realized a good chicken strip isnt just food, its permission to slow down and enjoy something simple.
Serving Suggestions
These strips shine with classic dips like honey mustard, ranch, or spicy sriracha mayo on the side. Pair them with roasted sweet potato wedges, a crisp coleslaw, or a simple arugula salad for a meal that feels complete. If youre serving a crowd, set out a variety of dipping sauces and let everyone choose their favorite. A light Sauvignon Blanc or crisp lager complements the herbs and smokiness beautifully. Leftovers also make excellent sandwich fillings the next day.
Storage and Reheating
Store any cooled leftovers in an airtight container in the fridge for up to three days. To reheat and restore the crispiness, place them on a baking sheet in a 200°C (400°F) oven for about 8 minutes, flipping once halfway through. Avoid the microwave if you want to keep that crunchy coating intact. You can also freeze the breaded uncooked strips on a tray, then transfer them to a freezer bag once solid. Bake from frozen, adding a few extra minutes to the cooking time.
Customizations and Swaps
For a gluten-free version, simply swap in gluten-free panko and all-purpose flour, the texture stays just as crispy. If youre avoiding eggs, try using a flax egg or aquafaba, though the coating may be slightly more delicate. Adding grated Parmesan to the panko mixture gives an extra layer of savory richness that makes them even more irresistible. You can also play with the spice blend by using Cajun seasoning or lemon pepper for a different flavor profile. These strips are forgiving and adapt well to whatever you have on hand.
- Try buttermilk instead of the egg and mayo mixture for a tangier coating.
- Use chicken thighs for a juicier, more forgiving result if youre worried about dryness.
- Toss the baked strips in buffalo sauce right after they come out of the oven for a spicy twist.
 Save to Pinterest
 These strips have become my go-to whenever I need dinner to feel effortless but still special. Theyre proof that you dont need a fryer or fancy ingredients to make something everyone loves.
Recipe Questions & Answers
- → How do I prevent the chicken strips from drying out?
Pat your chicken dry before cutting and season immediately. The mayonnaise or Greek yogurt in the egg mixture adds moisture to the coating. Monitor baking time closely—internal temperature should reach 74°C (165°F). Let them cool 2-3 minutes after baking for optimal texture.
- → Can I prepare these ahead of time?
Yes. Bread the chicken strips up to 4 hours ahead and refrigerate on the baking sheet. Frozen breaded strips can bake directly without thawing—simply add 2-3 minutes to cooking time. This makes meal prep convenient for busy schedules.
- → What's the best way to achieve maximum crispiness?
Use a wire rack on your baking sheet so air circulates underneath. Flip halfway through cooking for even browning. Drizzle with olive oil rather than coating heavily—less is more for crispness. Cool briefly before serving to allow the coating to set.
- → Can I make these gluten-free?
Absolutely. Substitute all-purpose flour with gluten-free flour and use certified gluten-free panko breadcrumbs. The coating method remains identical. Always verify that your mayonnaise or yogurt is also gluten-free by checking labels.
- → What dipping sauces pair well with these strips?
Honey mustard, ranch, and sriracha mayo are classic choices. Consider spicy aioli, barbecue sauce, or a tangy lemon-herb dip. The herbed coating complements both cooling and bold sauce pairings nicely.
- → How do I store leftovers?
Store cooled strips in an airtight container in the refrigerator for up to 3 days. Reheat in a 180°C (350°F) oven for 8-10 minutes to restore crispiness. Avoid microwaving, which makes the coating soggy.